

Whenever I share pictures from my wedding, I always get emails asking about my bridesmaid's bouquets.

I love books and wanted to incorporate them into as many ways as possible in the wedding, and these were a great way to do that. Plus, it saved roughly $1,100 on flowers. Winning.
My mom and I made them-we watched a bunch of different paper flower tutorials and kind of combined them all together to make these. I think they turned out so great, and I love that so many of my bridesmaids still have their bouquets.

If you want to make your own (you do, because paper roses made from your favorite book are just adorable), here's how to do it!
You will need:
-a book
-scissors
-a hot glue gun
Optional for a bouquet:
-floral stems
-ribbon


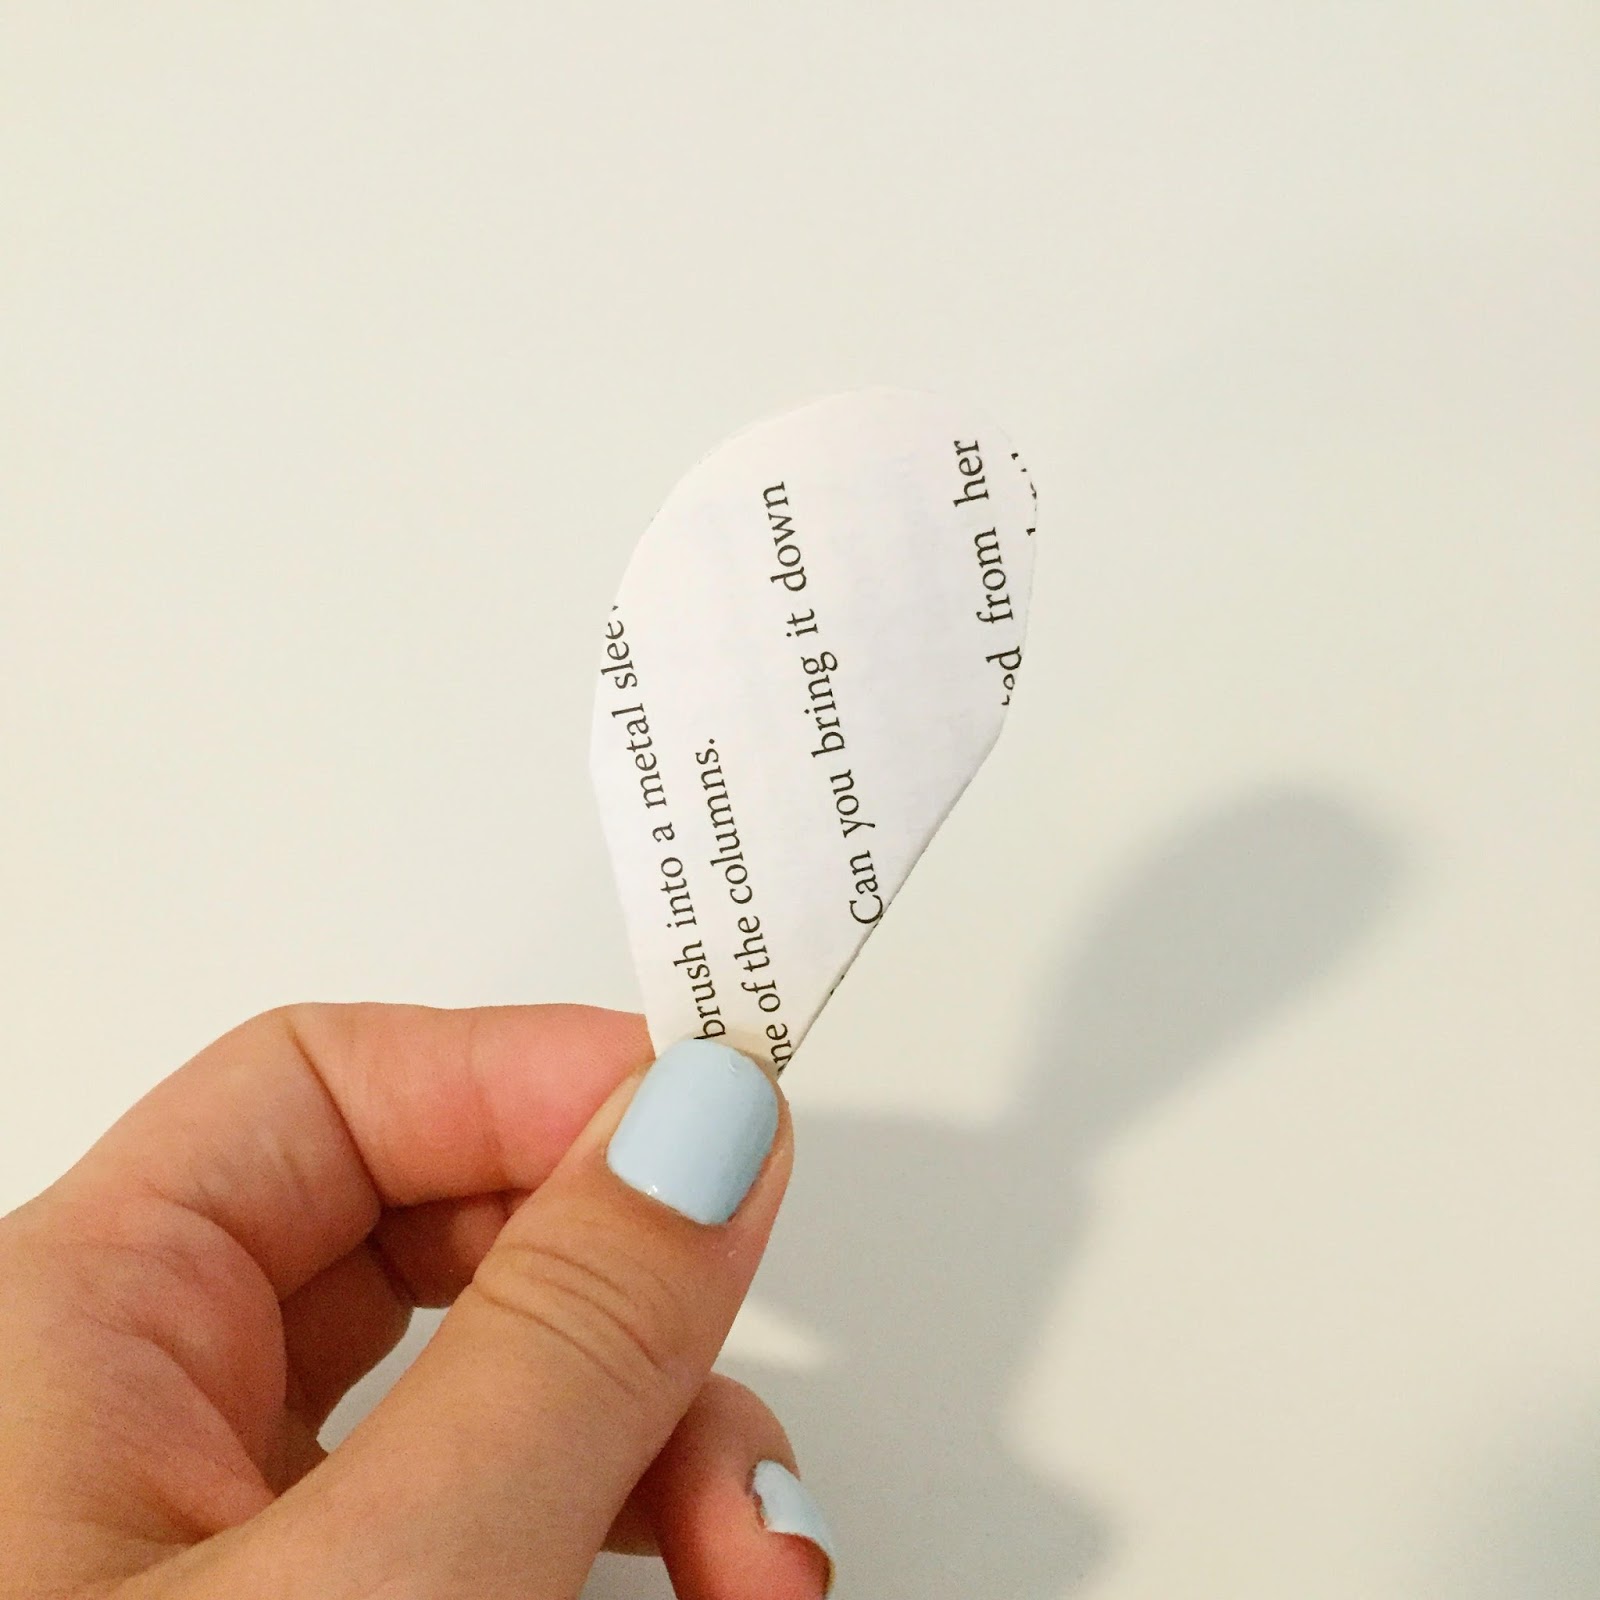
Cut off the page below the fold, leaving a triangle.


...and then again one more time, so you end up with this:


Or like a petal, I guess. But ice cream cone just sounds more fun.

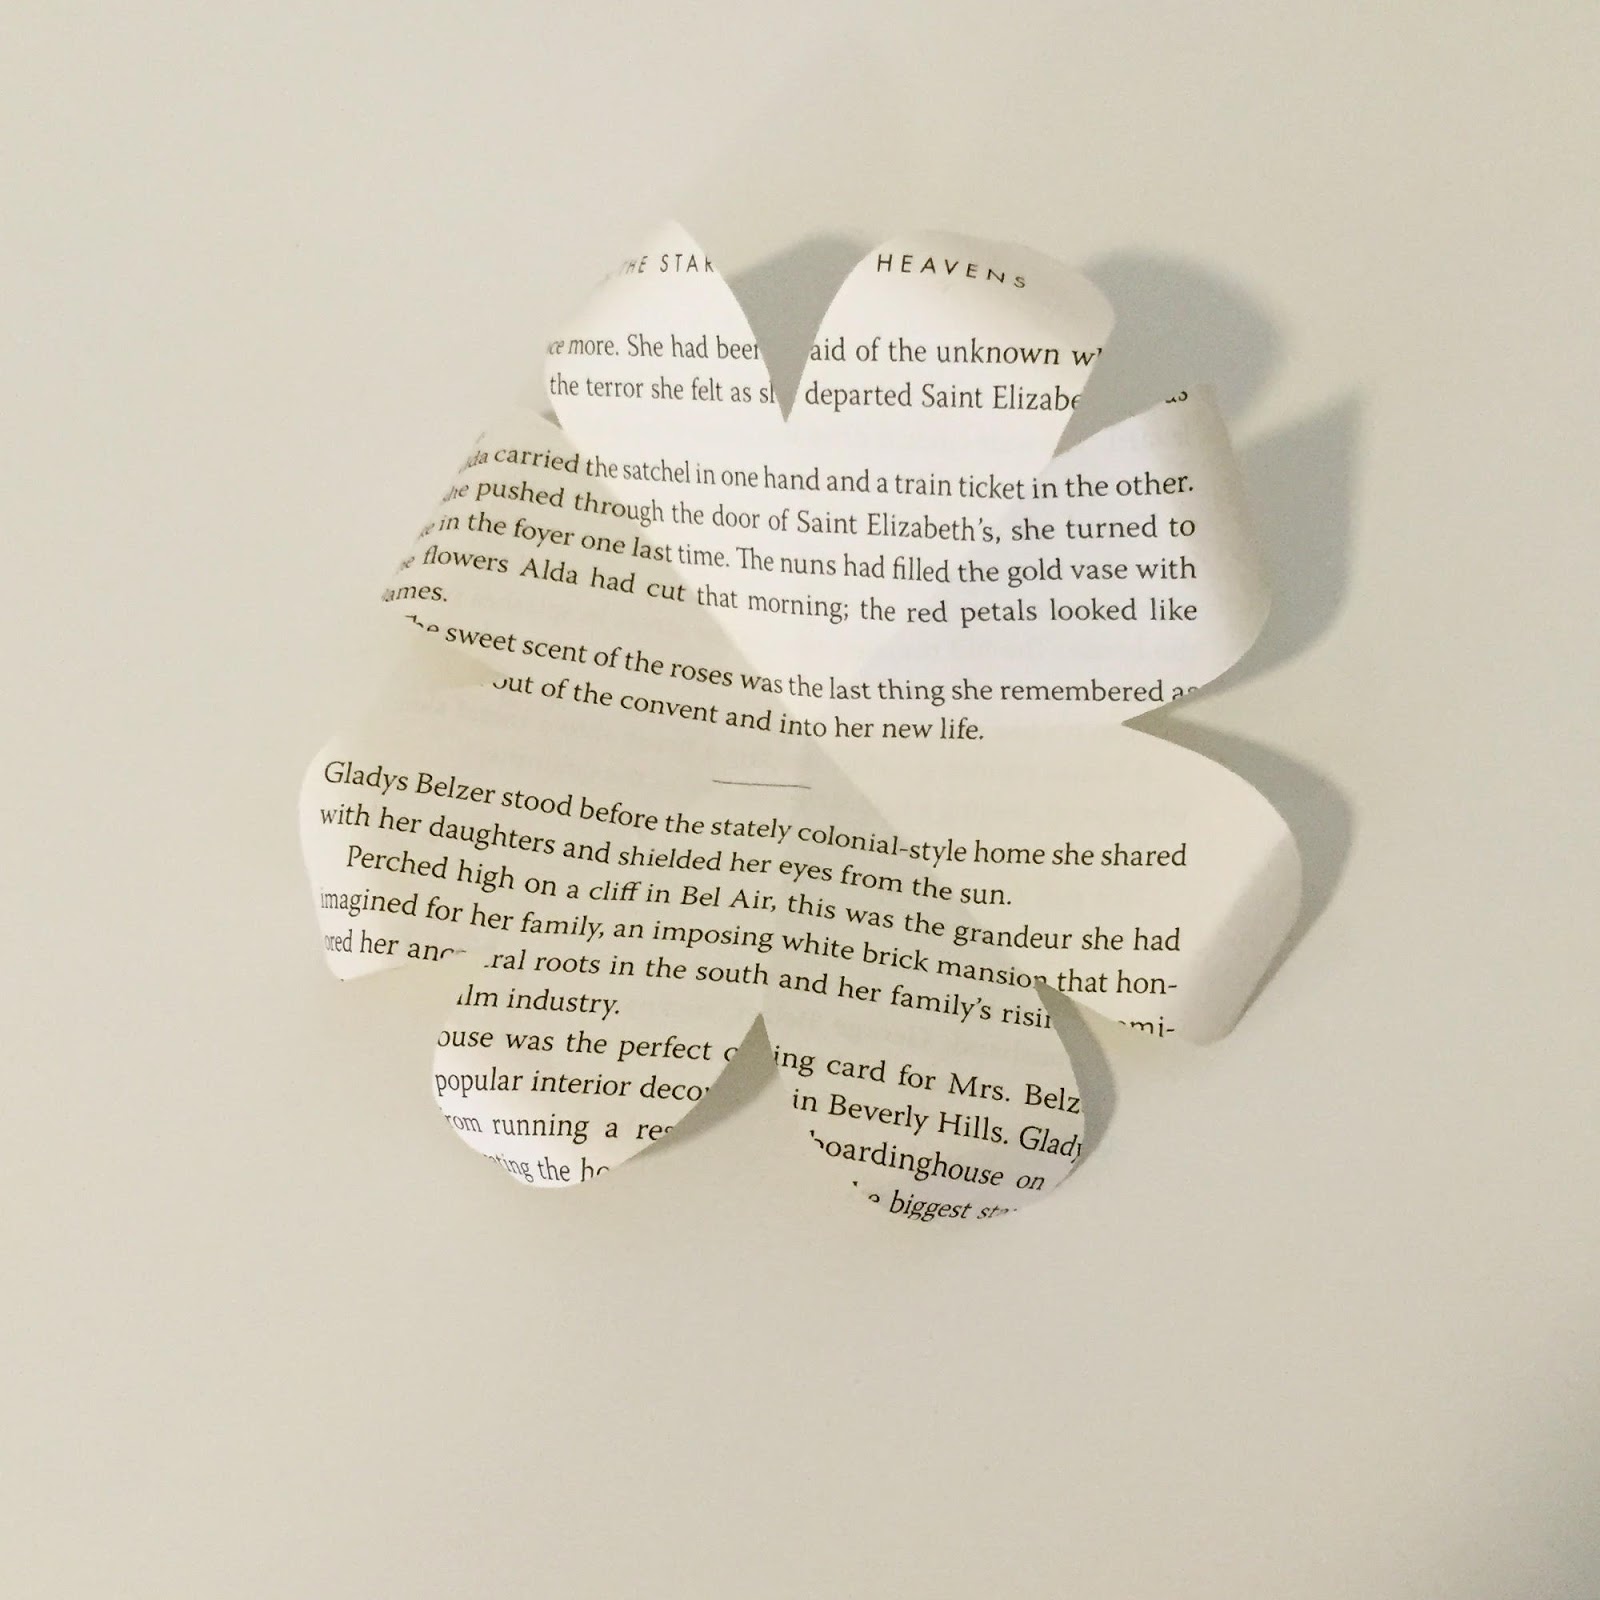
What you're going to do now is cut some smaller petals. Cut one petal from one flower, two from the next flower, and three from the next flower. Like this:


Using a glue gun, glue the flowers "back together" so that there is no gap in them.


When you get to the single petal, just roll in up in a loose tube. Your six pieces should now look like this:

Now onto the fun part: making the rose!
The flower with the most petals is your base. If you're going to be making a bouquet, take the stem and poke it through the base flower. If you're just making roses without stems, skip this step.

Next, take the second-biggest flower (the one you cut two petals from) and cut a little bit off of the bottom so it fits nicely into the base flower.

Using hot glue, lay this flower over the base flower.


Continue doing this with all of the pieces, in order from biggest to smallest. The smaller the piece, the more you might need to cut off from the bottom of the flower to make it fit the way you want it to.


If ever there was a DIY made for someone it was this one for you! xo, Biana -BlovedBoston
ReplyDeleteThese are so gorgeous! What an awesome idea for a creative, unique bouquet! Great job!
ReplyDeleteWhat a cute idea!
ReplyDeleteWhat a beautiful and different idea for wedding bouquets!!! I love it!! =)
ReplyDeleteI've been trying to spruce up my condo and this might be just the cutest thing I need to do as a sweet accent! Thank you for the DIY inspiration! =)
Have a great Wednesday! Melanie | Blog: Toots + Dill
What a fun idea!! Can I get a wedding re-do so I can incorporate these? ;)
ReplyDeleteThese are so pretty! Love how you incorporated them into your wedding as well, and saved a ton of money :-D
ReplyDeleteGreen Fashionista
This is such a fantastic idea! I love that you can keep them forever!
ReplyDeleteThese are insanely cool! I love that you can have them forever, just like my artificial bouquet that I made. I also loved my girls having a piece of something that I made! Great idea!
ReplyDeleteOk, these are so stinking cute!! I am almost positive that mine would not turn out this cute, though (craft challenged over here.)
ReplyDeleteThese are adorable and look so easy to make! You know, once you get past the whole ripping a page out of your favorite book part...
ReplyDeleteSo on the one hand, my book lover's heart does hurt to think about tearing out pages. But on the other hand, that same heart is jumping for joy over such gorgeous bridal bouquets! What a great idea for any bibliophile! They came out gorgeous :)
ReplyDeleteThis is awesome. I love that you used them for your bouquets.
ReplyDeleteI'm obsessed. I want to redo my wedding based on this alone.
ReplyDeleteIt would be so hard for me to rip out pages from a book (I'm one of those crazies that hates when people bend a book when they read it and ruin the spine), but these are so adorable!
ReplyDeleteOkay, I absolutely LOVE this idea!!!! Seriously, so unique and clever and beautiful! Great tutorial, too. I just wish I had a reason to make one. ;)
ReplyDeletexo
These are so pretty. I love this idea. I had a friend gift me a bouquet of them for my birthday one year and I loved it. I still have them.
ReplyDeleteI absolutely love this tutorial! Those paper flowers are too cute! Thanks for sharing! xo
ReplyDeleteSarah
www.belleinthecityblog.com
so lovely!!! and just my style- love these! thanks for the cute diy girl
ReplyDeleteCute! I have a bag of paper roses I made for our wedding that sadly I did not get to use. I can't bear to get rid of them since they were so much work.
ReplyDeleteOh this is fantastique. Pinning it to make these flowers later
ReplyDeletehttp://runwright.net
This is a great tutorial, Chelsea!! So fun! I really want to go find a book and make these now! :) Also, your photos are so helpful! I always struggle with taking photos for a tutorial, but yours really show each step clearly!
ReplyDeleteThis is a great tutorial, Chelsea!! So fun! I really want to go find a book and make these now! :) Also, your photos are so helpful! I always struggle with taking photos for a tutorial, but yours really show each step clearly!
ReplyDeleteThis is such a cute idea!
ReplyDeleteAnd for a side note, I really want a peak into your nail polish collection, because you always have the best colors in photos!
Gorgeous! I made all of my wedding flowers too! (I never update this anymore, but it's a quick recap: http://andersonwedding2012.blogspot.com/)
ReplyDelete